Gaia


I wanted to share a video compression tip that works for me. I use Premiere and usually export using the codec: h264 to create a final .mp4 file. Here’s a quick way to compress your video when exporting.
Open the Export window: File > Export > Media
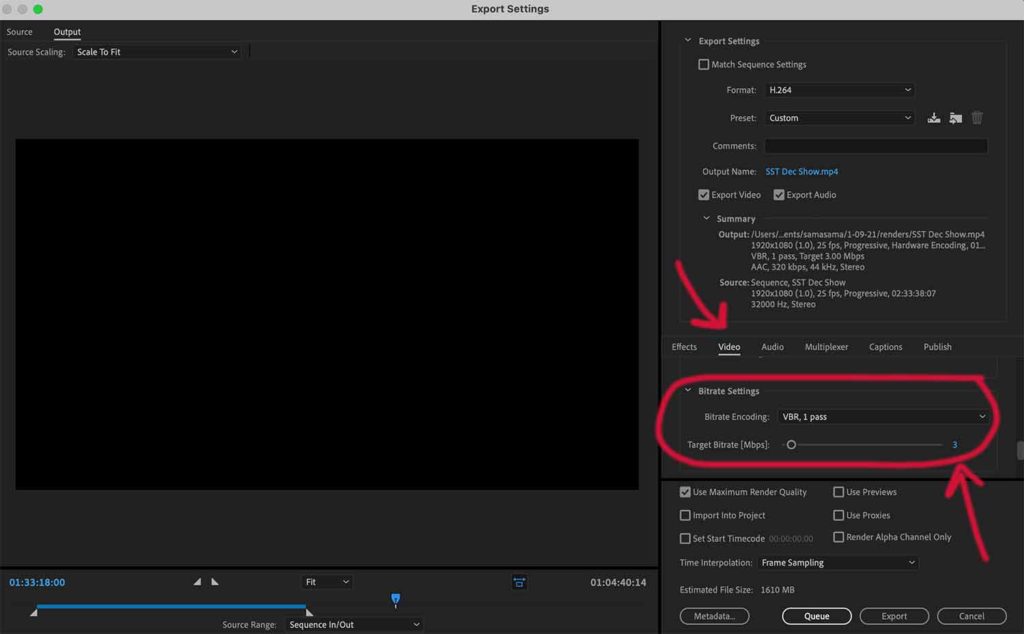
Go to the Video tab and scroll down to Bitrate Settings.
Go to the Target Bitrate and lower the number.

I lower the bitrate to 3. You can play with the number, but as you do, look to the bottom of your export screen to view the Estimated File Size after you make adjustments. It will show the size of your video every time you change the number. Lowering the target bitrate can cut down the size of your video dramatically. Compressing is all trial and error, but try to find a file size that you’re comfortable with and see how much you can lower the bitrate number without losing video quality. In the screenshot above, I compressed an hour+ long video from 6gb to 1.6gb. The quality was identical.

My introduction to Noni. It’s a Hawaiian medicinal plant known to have many health benefits. When I bit into it, the skin was pretty tough and it was bitter. If I had to compare it to something, I’d say the texture is like a really hard apple. I came across an interesting article after researching it’s origins and health benefits.
Read article by Canoe Plants of Ancient Hawai’i
Eckhart Tolle breaks down the meaning of ‘form identity’ and ‘essence identity.’

I recently started using the website development tool, Elementor. It’s a plug-in you can use in WordPress that allows you to edit, using their own custom features and interface. I’ve been using WordPress on and off for the past 5 years. Most times I would use themes and modify them, either using the admin area or by modifying and creating code. My review of Elementor is based on my experience using WordPress without it. I’ve used other editor plug-ins that also incorporate drag-and-drop functionality, but this one has become popular.
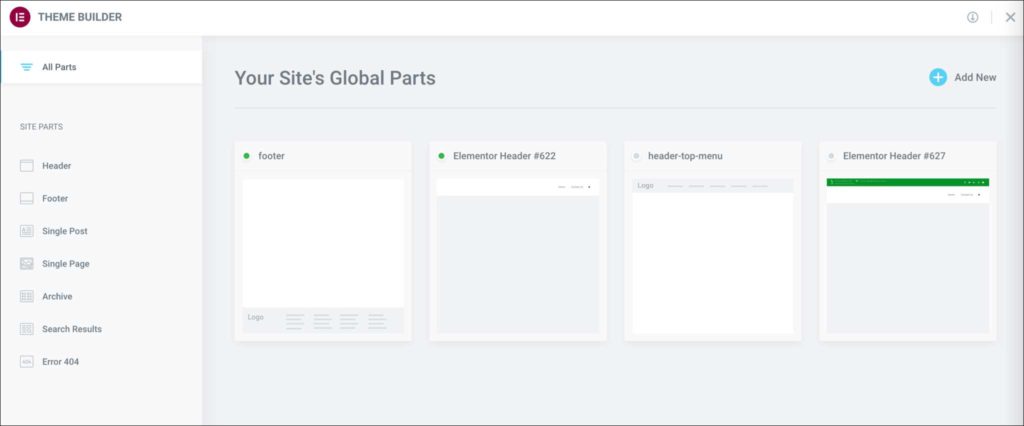
So far I think it’s dope. What I like about Elementor is the ease of using template sections. For example, you can create a header, page, or footer template section, and build brand new pages with the templates viewable inside them. Kind of like creating puzzle pieces and connecting and using them as needed. This was always possible in Dreamweaver or by hand-coding, but the way you create, modify, and reuse them while building your site is much easier. If you don’t like how that particular template section looks later on, you can create a new one (while the old one is still there), then import and modify to see how it looks with the rest of the website. The screenshot below is how the template page is displayed. You would click on the template to the right in order to see options of what pages to assign it to.
 So if you wanted to remove a template from particular pages, you would click on the template and remove the setting that applies it to its assigned pages. You then click on the template you do want, and set it to all the pages you want it displayed in. This process gives you a lot of flexibility on viewing and editing particular template sections of your webpage quickly without destroying the older ones. It’s a simple 3-step process and a lot easier to execute visually than Dreamweaver or hand-coding.
 I’ve only been using Elementor for a few days, but so far I like it. It took me about a day to get the hang of it, but I’m starting to see it’s benefits when I want to make changes later on. The 3-tab layout navigation on the left side is simple and intuitive, where you can toggle between ‘layout’, ‘style’, and ‘advanced.’ Layout is your first step in adding text and images. Style is stylizing your text (font, color, size), and adjusting image sizes. Advanced is like fine-tuning, which includes margins and padding. There are a lot more settings for each tab, but those are the basics.
All of these sections seem to have all the CSS styling and layout options you need without bloating it with useless stuff. No problems with viewing responsive pages on mobile and the drag-and-drop functionality is pretty seamless. Having a history tab where you can undo actions is super helpful. It removes the fear of breaking something and trying to locate the problem. Overall, the experience feels like you’re creating puzzle pieces and combining everything quickly in a way that’s easy to use and modify. It’s dope.
Recently shot this in Honoli’i. Talking story with Sam about his shoes and growing up in Honoli’i.
